Showing posts with label amigurumi toys. Show all posts

Sunday, July 2, 2023

New Pattern, No-sew amigurumi crochet project for beginners, Octopus

Easy Crochet Octopus: Perfect for beginners!

With simple instructions and video tutorials, even beginners can create their lovable amigurumi octopus. Designed with beginners in mind, this project is perfect for those new to amigurumi. You are guided through each stitch. Amigurumi octopodes are perfect for building your own collection of cute crochet creations. No safety eyes needed. You can make many in a day. Fun little gifts or toys. 
Now enjoy the photos of these octopodes. 

PATTERN can be found here: Amigurumi Crochet Octopus Tutorial

WHAT YOU´LL GET:

✅Printable PDF Pattern
✅Written Pattern
✅Video-Tutorial
✅Instant Download
✅Follow-up Service

PDF amigurumi octopus pattern/tutorial which contains instructions for each round, and videos with the links to my Youtube channel, and follow-up service if you have any questions following the pattern. Comes in ENGLISH - US crochet terms. Printable file has 4 pages.

Finished SIZE:
with 2,5mm crochet hook approx. 10-12 cm/ approx. 3,9 inches, including the tentacles.

YARN:
Yarn suggestion for 2,5 mm crochet hook: DK weight/Worsted Weight: Ricorumi DK, 25 g.
You may use bigger hook size as well, design won´t change.


To get you inpired, look at this lovely timelapse video:


And to show you one video of many, I´ll share the video how to make the eyes for your crochet octopus:

Friday, September 18, 2020

Amigurumi Fun


Amigurumi Snails

How it all started. This is my very first amigurumi design. But to go even further. I used to paint and one of my favorite themes was to paint shells, all kinds. This painting for instance is from the year 2006. I don´t have many left, but luckily one is hanging on my wall. Took a photo with my amigurumi snails. Perfect match I guess :) This tiny amigurumi snail pattern was the first pattern that I uploaded on Etsy. And my first buyer was a lady from Australia. Greetings to Australia! :)


For me, amigurumi is one way to express myself. I like to take photos and make videos. God knows I have tons of them, I´m being more consistent with posting them for the past couple of months. :) Like many designers my mind works on another project when working on the current one. I´m more determined now and hopefully more proficient in posting them and inspiring somebody to start making toys. 

As said, this design is from the year 2010, in 2020 I also used poppers. 

Please have a look:

video Amigurumi snail when using poppers

Very cute I find

And the video how to coil up and amigurumi snail

One stitch away snail

You can see a lot more in one of my previous posts: amigurumi snails in process

This time I made 7 amigurumi snails in total.  What´s great about this pattern is that it is quite forgiving as to mistakes and you can use different colors, put your own creativity into work. They make such a lovely gift, children can play with them, they also make lovely decorations on your plants, etc. 

Amigurumi tiny snail is also available on my Ravely shop if you like to keep your patterns there. And it´s a plus, I can also see your projects. 


Using sew-on snap buttons gives the possibility to uncoil and coil them up again. I also show how to coil it up with yarn. 

And for fun:

When the snail fits it sits.


Instead of flowers maybe?!

And there is a thing that I haven´t mentioned before. You can just leave it like this. When a little break is needed at the office just coil it and let go of all the bad feelings. And then hop, it uncoils 


Thank you for stopping by


Thursday, September 17, 2020

Teddy Bears - Expressing yourself through crochet

 Amigurumi Teddy Bears 

Welcome on board! 

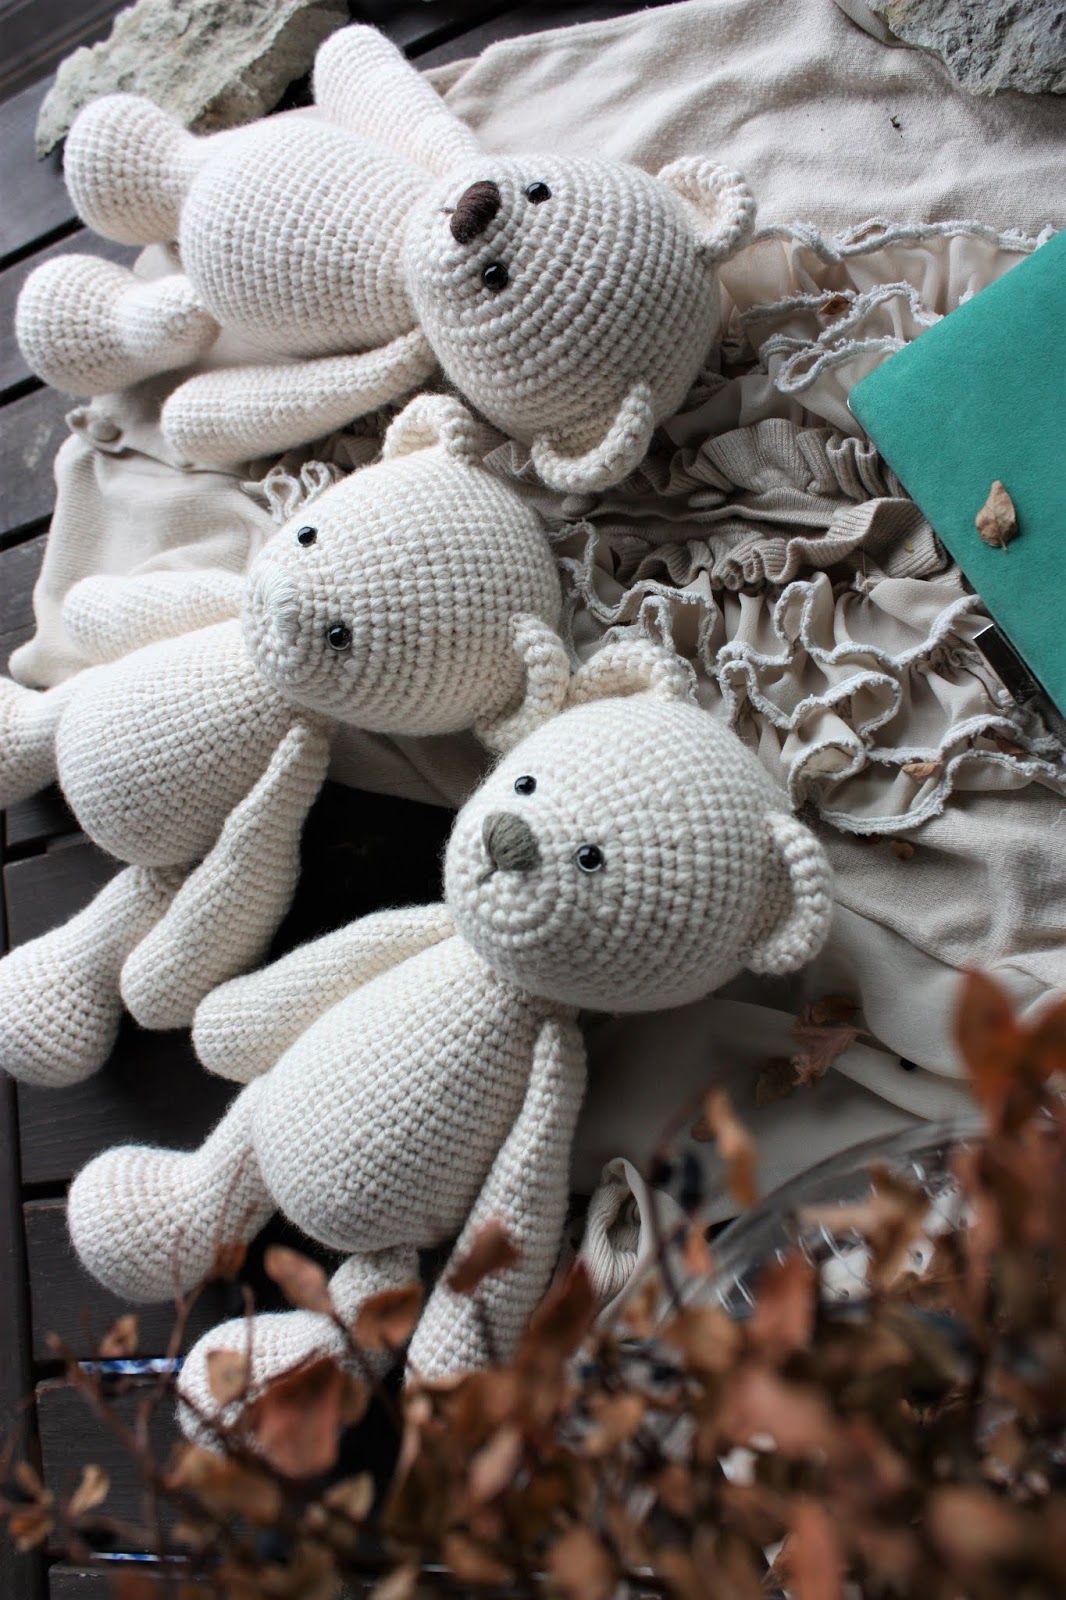
Photos of teddy bears to brighten up your day. 

All made with the design: Teddy Marta
Making process in my previous post: making teddy bears

Amigurumi toys are one way to express my creativity. I have been making amigurumi toys on and off for 10 years. It has become more a form of art. Yarn is a medium. I have hand-painted all the safety eyes for these amigurumi teddy bear toys. I painted a lot, now concentrating more on designing. This is something I am signed up for. I live to create with my hook, my hands, my imagination, that sometimes makes my brain hurt - there´s so much inside. Won´t deny it anymore. If something is worth doing, do it! If I win somebody else also wins. If I create, somebody else can also create, following patterns, and making crocheted toys. It is not just crochet you discover a lot of things about you: everything really: what drives you, what´s easy for you, what´s difficult, colors, emotions, shapes etc. You can actually make a physical object - for me, it´s important in nowadays world. So just print out the pattern and disconnect :):)

Let the toys speak instead


You may also find this pattern in my Ravelry shop
also can be found in Amigurumipatterns.net: Teddy Marta

Friday, September 4, 2020

Teddy Marta - New Teddy Bear Pattern

At first, I have to go back to the year 2018

Then I came up with my very first jointed teddy bear pattern. I did both 4-way and 5-way crochet teddy bears: One name was Marta and another one was Villem. 

This is Villem that is 4-way jointed teddy bear and is waiting its turn to be published. I started off with Marta and it took incredible turns. 


And this is Marta from the year 2018


They made part of the same pdf pattern. This year I decided to make individual downloadable patterns (easily followed) for both designs and I started working. What actually happened is that the whole process took over and I came up with two versions of how to make a jointed teddy bear (also jointed at the neck) and not only. I did go even further. I continued to search ways how these TEDDY BEARS could be played in many years' time - meaning, how could they keep their shape and how to avoid the head to get floppy. As to the result, I was able to release the teddy bear pattern which is a very cute, simple design (wanted to keep that one) and could be used many times to crochet different teddy bears. And there is a very important thought behind this design - LESS SEWING - I know some crochet toymakers can´t stand that part at all. So this is something for them. Plastic joints are used and places, where to insert the ready-made body parts, are all marked in the pattern. 

And I must say I´m really proud of myself. Not because I did it but because I didn´t give up finding the best possible way for this cub like a teddy bear to be released as a pattern. It contains 25 pages and photos. Also videos on my Instagram, a short-cut to those: Crochet Video Tutorials to illustrate some steps and processes. Some crocheters are more visual and that´s why it´s useful to follow these as well. 

Some photos of the process itself (like 1%, hahaa).


Final Result. I have put a lot of time and testing into this design. Now you can purchase this pattern for a small thank you price

Fully Jointed Teddy Bear Pattern on Etsy

Teddy Marta Pattern on Amigurumipatterns

and 

Jointed Teddy Marta on Ravelry

You may use the pattern all over again. Start making these artists bear like toys for loved ones but why not to challenge yourself or to start a little side-hustle to earn from your ready-made crocheted teddy bear toys. Everything is done for you. You may even purchase joint sets and my hand-painted eyes for this particular design. And always tag! Why? I may be able to share your work as well on my Instagram, FB etc. 


And I´ll come back for more posts and amigurumi toys. photos, videos etc.
Meanwhile, happy crocheting, and don´t forget to follow me on Happyamigurumi on Instagram
Why? Pic or a video per day! 


Thursday, August 6, 2020

New Jointed Teddy Bear Pattern - Amigurumi Crochet

I am so excited to share my newest and latest crochet teddy bear pattern - 5-way jointed teddy bear (also jointed at the neck) called Teddy Marta.

Actually, this teddy bear design is from the year 2018 Jointed Teddy Bears Villem and Marta I have worked hard on this design to provide a fun, enjoyable crochet teddy bear pattern. Now Teddy Marta is updated - upgraded - two in one - top-down version and down-up version. This crochet pattern has got 24 pages with guided photos, also related videos: Amigurumi crochet video tutorials


Jointed Crochet Amigurumi Teddy Bear

I got my head down for many weeks. I wanted to create an easy - enjoyable - always working - utterly cute - down to this point where nothing could be taken away - pure lines - minimum joining (only ears and a tail). This is a wonderful pattern for amigurumi crochet lovers who don´t like sewing body parts together. 

Personally, I´m drawn to simple and pure lines and it´s the most difficult thing in designing amigurumi toys. Taking everything away (at first, you can always add them, but they don´t make a part of the design): no bows, no ties, no ribbons, no booties etc. All can be added afterward though to make your teddy even more personal. I want to see the design working not the accessories. 

A jointed teddy bear is fun: all arms and legs are moving, also the head. 

You need safety joints to create this crochet teddy bear, but of course, buttons are also a way to go. 

You can also find the kit as to eyes and joints that fit perfectly for this crochet teddy bear in my shop: Safety joints and Eyes for Teddy Bears

This amigurumi design is designed in a way that all places where to insert the joints are marked in the pattern. I went even further: you´ll have two approaches to make the 5-way jointed teddy bear. I´ll give you both. I´ve created two ways: from top to bottom and from the bottom to the top. This is a matter of taste really. Some might find the first one more convenient and some the other approach.

I would suggest you try them both and then make a third bear in your preferred way. I like them both and what´s more important, they do give a slightly different shape to the body and how the head is positioned. 

I will add video tutorials as well as a supplementary to the pattern itself (even everything is described in a pattern, sometimes visual approach helps), so stay tuned. 

They will be listed here: happyamigurumi crochet video tutorials


Share your crochet projects and feedback 


Some additional information about the pattern:

it comes in 23 pages and is detailed with photos. I also offer a follow-up service if needed. Just send me a message and I´ll get back to you as soon as possible. Crocheting has to be fun!

Amigurumi Teddy Marta is crocheted in the round. Do not join the rounds.

Mark the beginning of your rounds with a stitch marker or safety pin. I use yarn

to mark the beginning of each row but you can choose whichever way works

best for you.

Size: with 2,5 mm crochet hook:

Approx. 22cm/8.7inc, 18cm/7.1inc, while sitting.


Tools and materials what you´ll need:

1. 2.5 mm crochet hook

2. Alpaka Premium, Schachenmayr smc, 100 g = 200m = 109 yds, DK or any other Alpaca yarn.

(also depends on the tension you use when pulling the stitches)

3. 8mm black or brown safety eyes (or whichever other color works for you)

4. For the filling: sheep wool or fiberfill or any other toy stuffing. Stuff gradually (I also mark places where I stuff in the pattern, you can take this as a guide).

5. Joints: 3 x 16mm joints for hands and head and 2 x 20mm joints for legs. 


Crochet skill level:

This pattern requires knowledge of basic crochet terms:

Crocheting in the round

forming a magic ring

single crochet stitch (sc)

single crochet increase(Inc)

single crochet invisible decrease (Invdec)


Terms:

“Magic ring”: an adjustable loop with 6 sc, pulled together tightly, there is no

hole left in the middle.

“Neat finish”: this is one of the methods used to finish toys in amigurumi.

I will describe it my pattern as well. 


Abbreviations used:

Sc – single crochet

Inc – increase

Invdec – invisible decrease

3 sc in one – 3 sc into 1 sc

Sl. st. – slip stitch

Ch. st. – chain Stitch


Thank you!

More lovely photos and posts to come with this crochet teddy bear pattern. 


Monday, October 14, 2019

Lucas the Teddy Bear in process - Black one

Amigurumi Crochet Teddy Bear

I´m in the middle of crocheting new teddies, black ones this time.
In process.

PATTERN: Crochet Bear Pattern - Lucas
or in Raverly: Crochet Toy Patterns

HOOK SIZE: here 3mm

YARN: here Scheepjes Stone-Washed XL

EYES: here 8mm hand-painted eyes: I do have one set in my shop: Safety Eyes for a Teddy Bear

I also recommend a very good yarn if you want to achieve a vintage look:
Katia Cotton Merino

I have some helpful videos too: crochet video tutorials for Lucas the Teddy


Thursday, July 4, 2019

Lucas the Teddy Bear - Crochet Toy Pattern

Amigurumi Teddy Bear Pattern 

White Teddy Bears
- Scheepjes Stone-Washed XL yarn. 3 balls (150 grams)
- 3mm crochet hook
- 8mm safety eyes, I used hand painted safety eyes that I paint my own.
Some sets available here: hand painted safety eyes
- size: 33 cm
one suggested way of crocheting body parts (tension may be different)
1st ball: legs, ears, a tail
2nd ball: a body, a hand
3rd ball: second hand, a head

Classic Teddy Bear Tutorial


There are also some useful crochet videos to help you along the way: how to add safety eyes, how to embroider the nose, how to stuff your teddy bear, how to assemble body parts etc. 
amigurumi crochet videos

I have used from 2mm up to 4,5mm hook size with this teddy bear pattern and it has always turned out great. I´ve created a design that looks lovely when tiny or big. 


White on white snow


Scheepjes XL: 70% Cotton, 30% Acrylic. Gives this a bit vintage feel that I like on my teddy bears because the design has this traditional and classic look. Crochet teddy bear that lasts. 


With different safety eyes and thread to embroider noses, you can create a whole new look. 


I have been designing and creating crochet toys for more than 10 years now and if I can use only single crochet stitch to create something like this (yes, it takes time, a lot more you think or I have ever anticipated  :)), it really fascinates me, the way how to create lovely and memorable crochet toys with only single crochet stitch. Personally, I don´t need fancy and complicated stitches to create something beautiful. I want to show you that with only single crochet you can crochet up a stunning teddy bear. Simplicity is my thing. Let the teddy talk :)


Please do share your versions with Lucas the teddy on Instagram or Ravelry using tags: #lucastheteddy or @_happyamigurumi. I´d be delighted to see them all. Thanks and see you in a short time with more crochet toys and patterns. 

Tuesday, June 18, 2019

Hope the Bunny - a bit more of this crochet pattern

New Crochet Bunny Pattern


One new crochet design has been published. Hope The Bunny on Etsy and Hope the Bunny on Ravelry. Hope has been tested by 5 crocheters across the globe, as well as edited by a technical editor. 


Hope took a bit longer than I anticipated and gave me a bit of grief (like seen on the photo, constant "dialogue") but I´m really pleased with the outcome. 
Constant "dialogue" between me and Hope while designing.


This crochet pattern is easy to follow, including 28 pages with photos. In addition, the pattern also includes the tutorial for the vest. You may also find some helpful videos in my crochet video tutorials 


And what´s that thing with bunny´s tails? There´s definitely something. When kids are looking at my ready-made toys, they make sure there´s a tail. 


 And then those buttons, some of which are over 30 years old. 


a) Add a button loop with some ch sts (3-5, depending on the size of your button). Then you can button and unbutton your bunny´s vest or

b) You could sew on a snap-button or a fine ribbon to tie the two parts together.  

The crochet design progress on photos:


I mentioned in my previous post that designing simple things may be actually the hardest. I want to share some of the photos. Only a few to describe the process of crochet designing. They aren´t neat but will definitely show you the work behind designing Hope.


And some photos of the „real“ beginning.


At my desk. 


And now the question, why I called the design Hope? We all need love, faith, and hope, and when I started designing this crochet bunny, I knew I was going to do something new and full of challenges – Only thing I had was the drawing. I also had to find a new technical editor. Name Hope, this 4 letter name just popped into my head. Hope you also like Hope!